In class when we learned about 3-D shapes, we had the opportunity to play with the wood blocks shapes and also the blue plastic shapes. I liked the way we were given a chance to look at all of the shapes, touch them, count the sides, and just have time to play with them. I also really enjoyed the way we were challenged to classify the wood ones, and when we were asked to order the volumes from smallest to largest before filling the blue ones with water to compare the volumes. Those are both things that I would love to use in a classroom someday! The mystery shape game was great as well. We did some really great activities in class with 3-D shapes that I'd like to use later on.
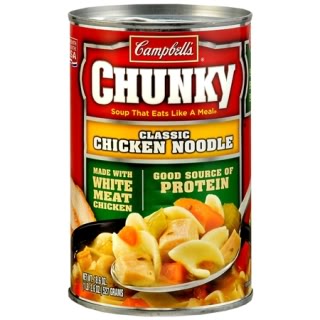
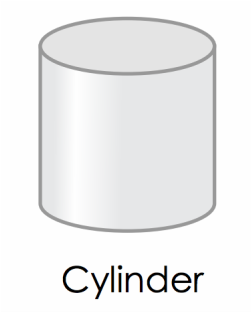
I think that a good way to teach 3-D shapes to students would be to show them where they see the shapes already in their everyday lives. After teaching them the properties of the shapes, I would show them examples like these and ask which of the shapes they look like. | A soup can... | ...is a CYLINDER.
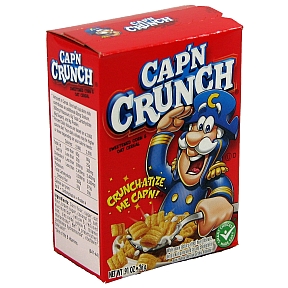
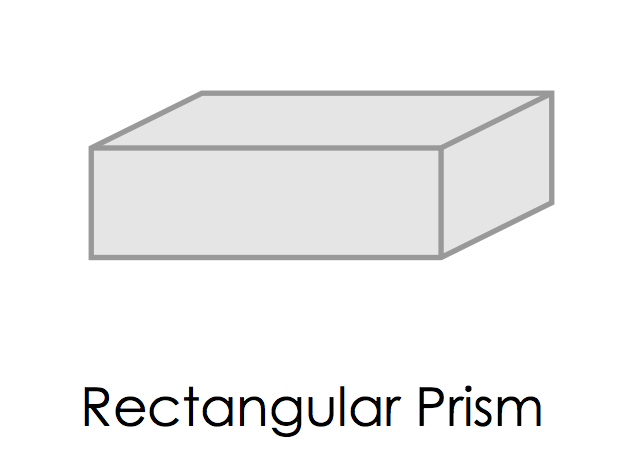
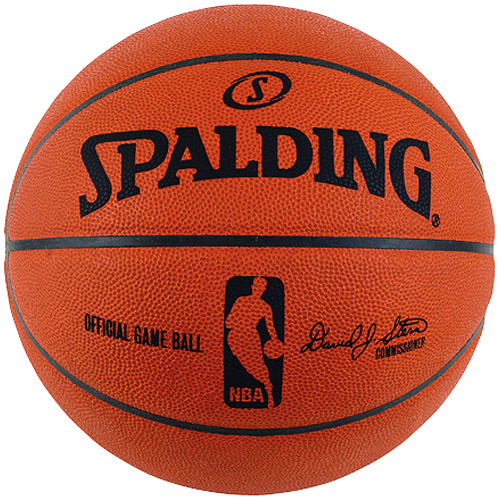
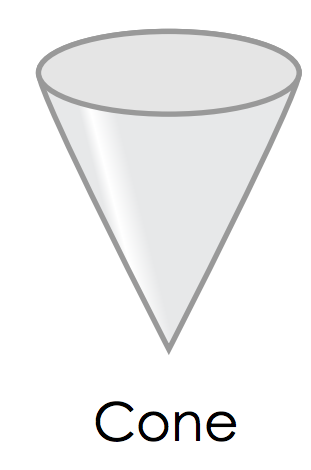
| A CYLINDER is a solid object with two identical flat ends that are circular or elliptical, and one curved side. Many cans of food in all shapes and sizes are cylinders, but other things such as a footrest could be a cylinder. | A cereal box... | ...is a RECTANGULAR PRISM. | A RECTANGULAR PRISM is a solid 3-D object which has six faces that are rectangles. Many boxes are rectangular prisms, but so are other things like books, mattresses and boards, to name a few. | A basketball... | ...is a SPHERE. | A SPHERE is a 3-D object shaped like a ball. It is perfectly round, and every point on the object is the same distance from the center. Tennis balls, soccer balls, oranges, and globes are all spheres. | A party hat... | ...is a CYLINDRICAL CONE | A CONE is a solid 3-D object that has a circular base and one vertex. A party hat is shaped like a cone, and so is an ice cream cone. Reflection: I found that certain shapes were much more difficult to think of examples for than others. I also realized that when teaching about 3-D objects in this way, by relating them to everyday items, it is important to clarify to students the difference between something that is a solid versus something that just looks similar to the shape. For example, a party hat is not solid, and does not actually have a circular face on the bottom. This may be confusing to students if you do not clarify the difference between these. It is okay to say that it looks similar to the object, but it is important when talking about the definitions of the 3-D shapes to clarify that.
I think that a worksheet could be made up where students could fill in the blank under a picture of an object, saying what shape the object is. I also think that students could be challenged to go home and write down, take pictures of, or even bring to class objects they found that looked like the shapes. The definitions for the shapes that I gave came from the website, Math is Fun. This website has lots of links, including a dictionary of mathematical terms simple enough for students to understand. The website could be used as a resource in the classroom in multiple ways. Here is the link: http://www.mathsisfun.com/index.htm
Tonight was Family Math Night at Griffin Elementary School. To be honest, I was a little bit disappointed with how the night turned out. First of all, we arrived late due to classmates not meeting at the correct time and us getting lost on the way. My partner could not come tonight, and although I knew that ahead of time it was frustrating as well. When we got to the school, I set up in a classroom at the end of the hallway. We were told there would be lots of students there, as many as 200 even. That was exciting. So I set up the posters and the game on my table, and waited for the students. And waited. (Remember, I came late. I was expecting to be way behind everyone else, not to have to wait for students to come to me.)
However, the students did not come in a tidal wave either. They barely began to trickle in, at most we had one family at a time in the room where there were two games set up. The students were much younger than I had anticipated, I only met one student who I was able to play the game correctly with, without having to modify the rules to help them understand. This is not because my game was too difficult, only because I was expecting to have 3rd through 5th graders and instead ended up with mostly preschool through 1st graders.
Just for a reference, in total, 8 students played my game tonight. They were the only ones who came into the room to play. Much less than I was expecting.
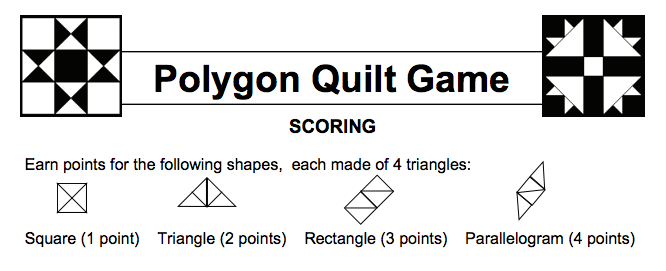
Here is the game that we intended to play with the students, and practiced with the 5th graders both days. For this game, students were given a paper with four of these grids shown below. One grid was necessary for each game. The students were to play the game against one another or against a parent, each filling in one triangle at a time (similar to the idea of Connect Four) until they had formed one of the shapes. The shapes, as shown above, are worth different amounts of points. The players were allowed to block each other from completing the shapes by filling in the triangles nearby. However, all but one of the students had to have the game modified for them. That was fine, because I know that as a SpEd major I'm going to have to get used to modifying activities to suit individual students' needs. Many of the students were able to play the game by taking turns finding and filling in the whole shapes on each of their turns. A few were too young for that, so I let them use the crayons and just color shapes on the page because they didn't understand the competition of the game.
All in all, I learned a lot from tonight. But it was frustrating to not have many students come to play the games after we put so much hard work into planning them. And I wish I had known in advance that the students were going to be so young, I would have planned a different game entirely. But oh well. It is over now, and it was a good experience to have under my belt. Not every activity is going to go perfectly in the classroom, I might as well come to grips with that now!
Dissection in math.
This isn't the type of dissection where you poke around a frog's guts trying to find the heart.
I have no idea who this girl is. But she doesn't seem to be a fan. Frog guts are gross.Dissection in math is a whole new way to look at shapes. It is mind blowing in a lot of ways, and it has been interesting to research this field of math that I hadn't heard about before. Wolfram MathWorld helped me a lot with my research, so I can't take the credit for some of these pictures or definitions. Here is the link to my source: http://mathworld.wolfram.com/Dissection.html Basically, dissection is the theory that any two shapes with a common area can be dissected and folded in to one another. For example, this triangle, when unfolded correctly, or split up into smaller shapes, forms a square of an equal area. I discovered dissection in class last Friday. We were working on finding the areas to shapes as a class, and sharing our different methods of determining the area of each shape. We discovered that there were many different ways to find the area. But I have a method I've been using since I can remember. With shapes on a grid, I've always tried to match up the partial pieces to form whole squares on the grid and then I count up the squares. Easy enough right? Just like a puzzle. Find the pieces that fit together, and you have your area. Boom. But I didn't know that it was actually a thing! I thought it was just the easy way I tested out of 5th grade geometry without learning any equations. But apparently dissection IS a thing....and its fun! Very addicting, I might add. I love it.
In class on Friday, I spent a long time trying to figure out the area of a complex shape "my way". I'm one of those people who has to finish something they start when I'm really excited about it...or I'm just stubborn. Regardless, I decided to cut apart the shape that I was using to try to reform it, because just drawing it out wasn't helping me. I cut apart the shape and tried to fit the pieces together. And even though it took me a LONG time (yes, I know I spent the remainder of class working on it even after the rest of the class moved on) eventually I did find the area of that darn shape. Using MY method. Taking the shape apart and fitting the pieces together like a puzzle until they formed a shape I could measure the area of easily.
So, what I was doing was very similar to dissection. Essentially, I was cutting the shape apart and fitting the pieces into a different shape. BOOM. Learned something new!
I tried to take pictures of the work I did, but they weren't turning out very well. Sorry!
Reflection:
Through this activity, I definitely learned something new. Before this I hadn't even realized that dissection existed in math. Now I found something that wasn't only new, it was exciting and fun. I wish I had learned more about it earlier on. Like when I was in 5th grade and I thought I had gotten away with cheating because I used a different method than the teacher and tested out of the class anyway. They could have taught me then that what I was doing was another mathematical theme! As I go through my education classes and hear about all of the problems with education, I'm starting to realize the truth in the idea that maybe teaching kids a cut and dry idea and trying to get them to memorize it exactly the way we teach them is wrong. As a student, I discovered this way of doing math on my own without any teacher showing me. And I got the correct answers. I just got in trouble a lot for not showing my work. Sometimes teachers are so worried about cheating that they make kids show their work, and then if the work they show doesn't look like the method the teacher uses, they count it as wrong. That isn't a good way to teach. Its a good way to kill inspiration, excitement, and creativity in students. I was a good student who was curious and found my own way to do math problems. It is frustrating that my curiosity in math was not encouraged, but instead mistaken for cheating. Maybe I would have enjoyed math a lot more if the opposite were the case!
I don't want to end this post on a bitter note. So I'm just going to say, I love dissection in math. I love it a lot more than I wish I did! Math isn't all bad. It can be fun. Like a puzzle. :)
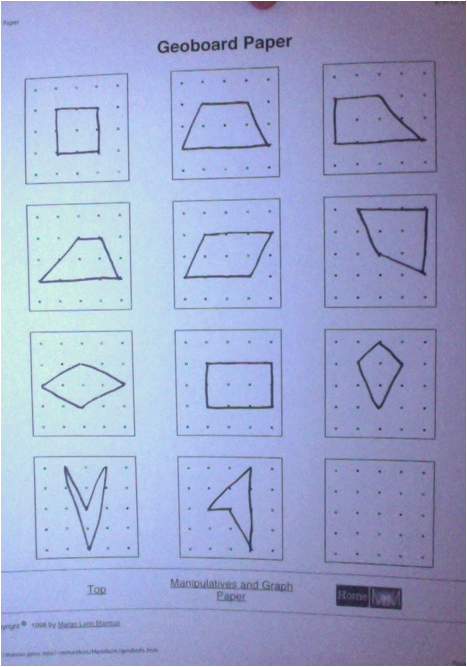
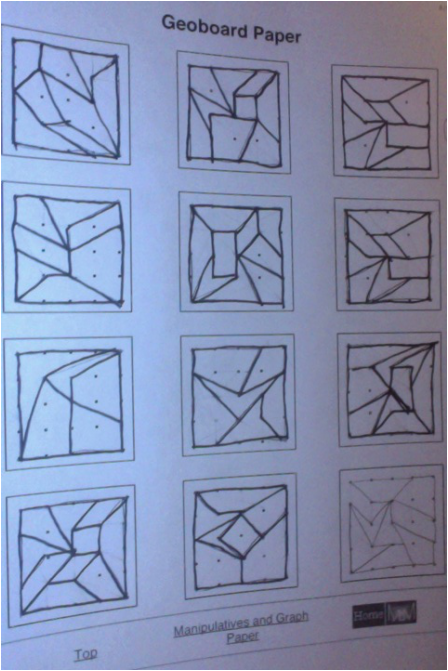
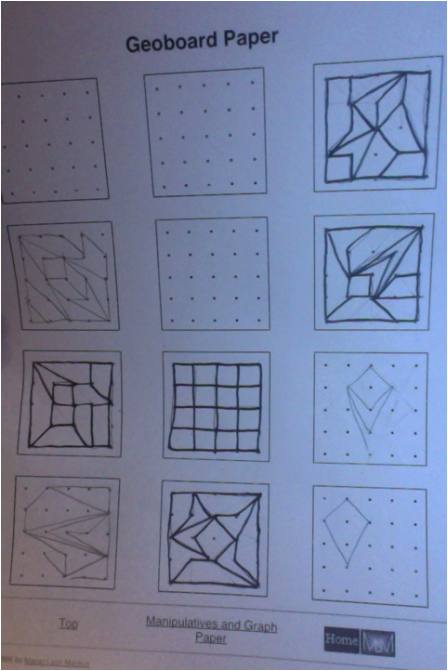
For the past couple of classes we've been talking about quadrilaterals. There are 11 different main types of quadrilaterals we discussed in class, as shown below. For SBG #2 question #7, it said to divide up a Geoboard into four or more different types of quadrilaterals. I not only took this as a challenge to fit as many quadrilaterals as possible on the Geoboard, I challenged myself to represent as many different shapes as possible. These were some of my attempts to fit as many different quadrilaterals onto one Geoboard as possible.
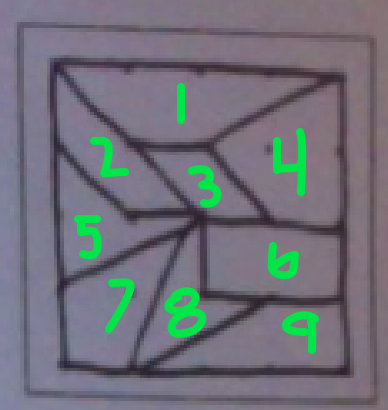
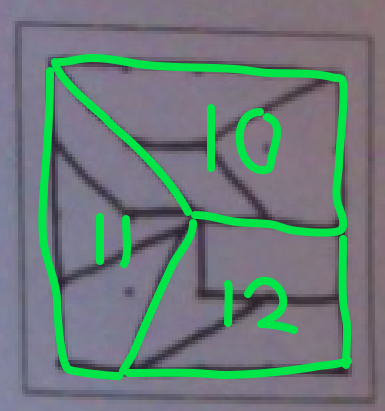
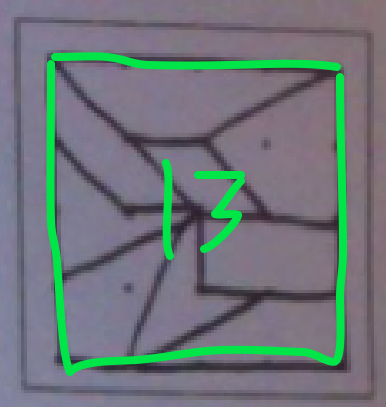
In the end, this was the division I was the most confident in. It is divided up into 9 separate quadrilaterals, which is the most I could fit on one without repeating any of the shapes. Here we have 13 found quadrilaterals, as identified with numbers. At first it only appears to have 9, but a second glance shows there are more quadrilaterals on the Geoboard. This involves combining some of the smaller quadrilaterals to form larger ones. | | The quadrilaterals represented are:
In the original 9:
1. irregular trapezoid
2. regular trapezoid
3. parallelogram
4. general quadrilateral (convex)
5. general concave
6. rectangle
7. kite
8. chevron
9. right trapezoid The others:
10. right trapezoid
11. general quadrilateral
12. right trapezoid
13. square
|
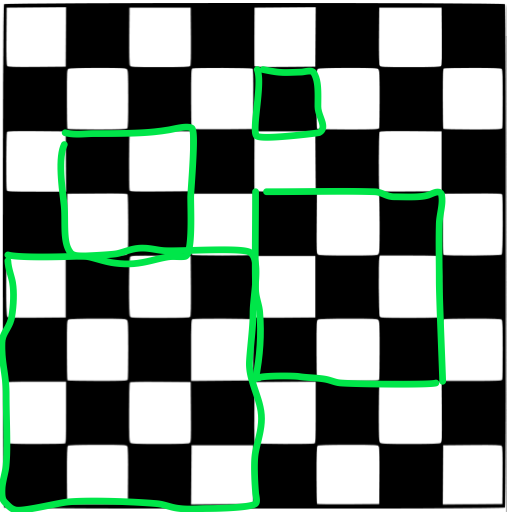
This is similar to the old chess board trick. Someone will ask, "How many squares are on a chess board?" And a person will generally count them up, counting 64 total. But they forget to count all of the combinations of squares that make larger squares! I found a website on this, giving ideas of how to use this principle in the classroom. Looks like it could be useful! Here is the website. http://www.teachingideas.co.uk/maths/chess.htm | |
Reflection: This activity had me thinking about quadrilaterals for a longer time than I wanted to. Trying to divide up the Geoboards into as many quadrilaterals as possible, without repeating any, was frustrating. There were many more trials and errors than what was even shown on the two worksheets. Lots of erasing lines and redrawing them, I wasn't going to settle for there being spaces left over or just putting in a big shape where smaller ones could fit! Over all I enjoyed this. It was fun to explore the different combinations and figure out which shapes fit together best, whether it was smarter to put the points toward the middle or the corners, etc. I learned a lot about quadrilaterals and I don't think it will be easy for me to forget the different types ever again! Also I realized how much teaching potential there was for this. Lots of lesson plan possibilities to be centered around quadrilaterals.
Also, because I spent to much extra time on this, it was the weekly work for both 7 and 8. I would also like for this one to be considered for the SBG grade...because the question came straight from it!
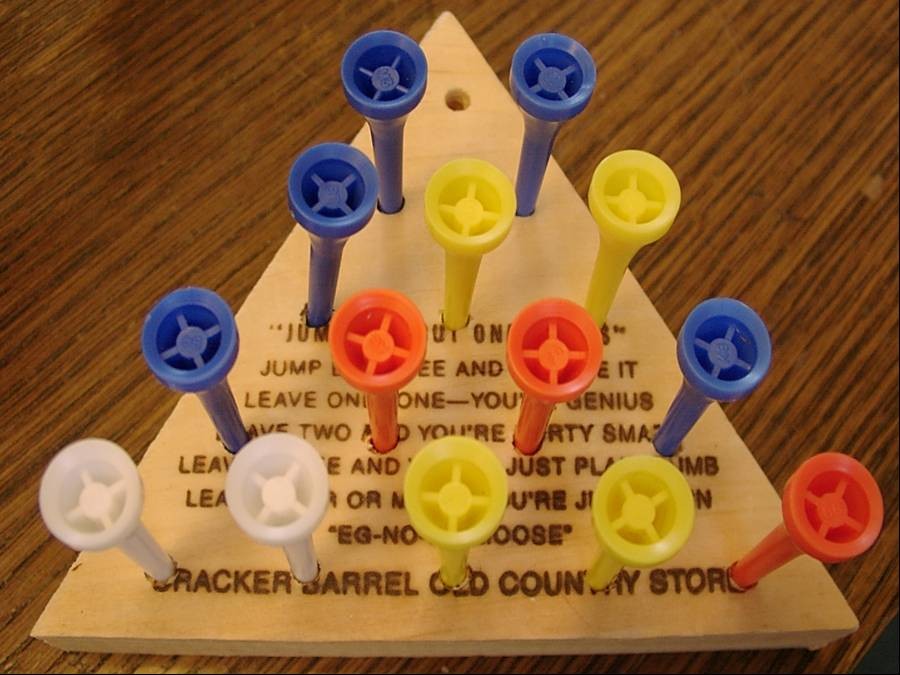
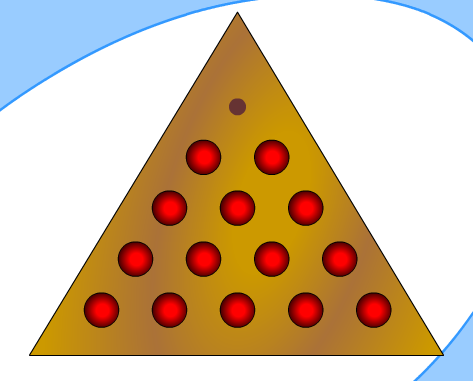
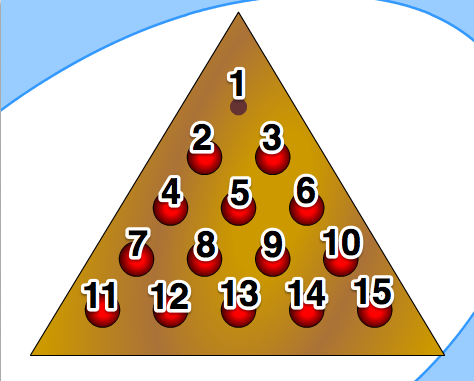
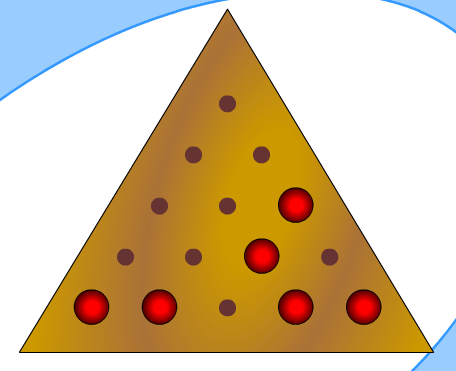
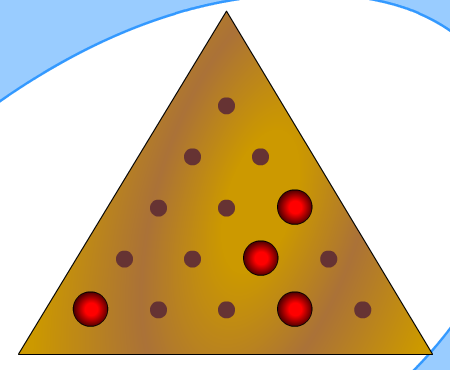
THE CRACKER BARREL TRIANGLE GAME Anyone who has been to Cracker Barrel will recognize this game. My family stops at Cracker Barrel once a year on our annual trip down to Florida for spring break. My older brother and I have this ongoing competition to see who can get down to only one piece on the board. He's a super competitive engineering math guy, so he always tends to win. At everything. And in this case, it usually ends with me having to eat something gross. But the more I thought about this game, I started to wonder if there is some kind of pattern to go with finishing it down to one piece every time. I started to experiment with the game to see if I could find a pattern that would guarantee a win every time. Because I do not have one of these games in my possession, I found an online version to play around with. You can find that version here: http://www.memory-improvement-tips.com/pegs.htmlThe instructions for the game are as follows: After a lot of experimenting, I finally figured out a pattern that worked. This pattern starts with the top hole empty. (It can be any of the corners, just depends on which way you turn the triangle). When I reference the numbers, I am numbering the holes from top-down. Like this: The first 3 jumps to the pattern are: 4-1, 6-4 and 1-6.
The next moves: 7-2, 13-4 and 2-7.
Next: 10-8 and 7-9 clear the second row
15-13 and 12-14 clears the bottom
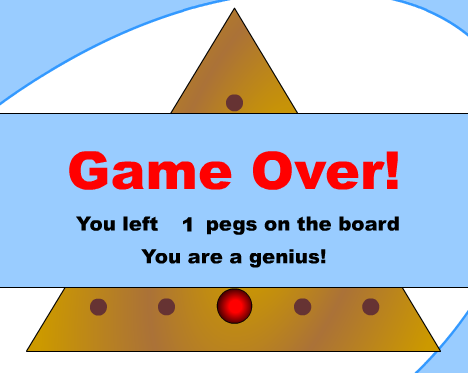
Now for the last step: 6-13, 14-12 and 11-13. WINNER!
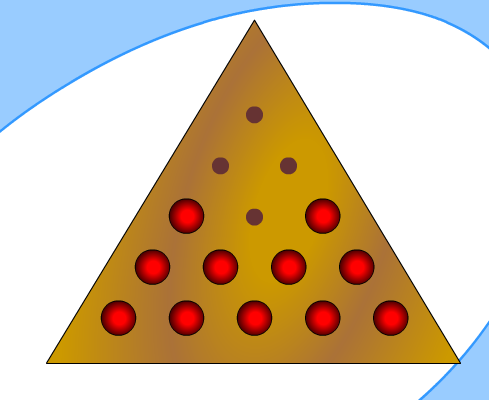
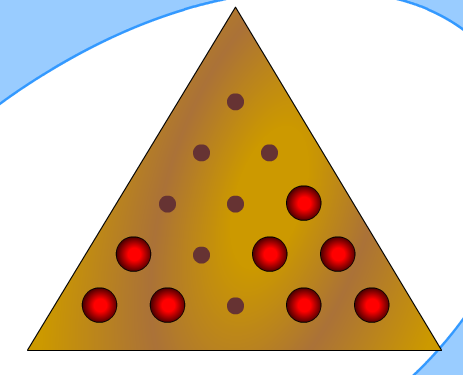
Note that this pattern is only made through an hour or so of trial and error. I played the game multiple times, each time recording my moves. Many times it ended in failure, with multiple pegs left on the board. This pattern was a success. It is proven to work every time that the game is started with the first hole left empty.
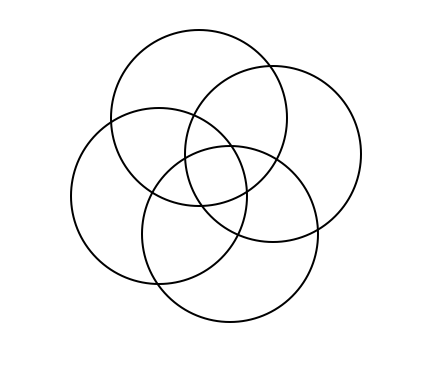
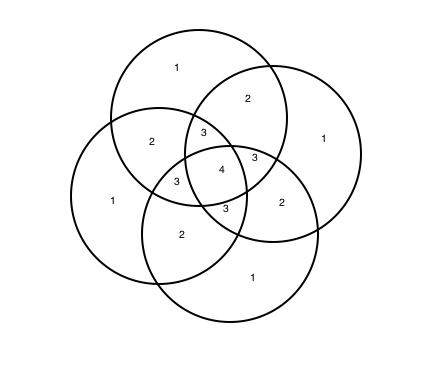
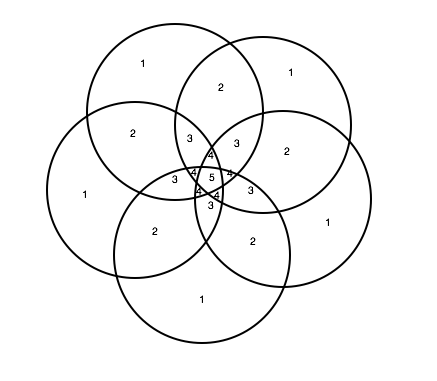
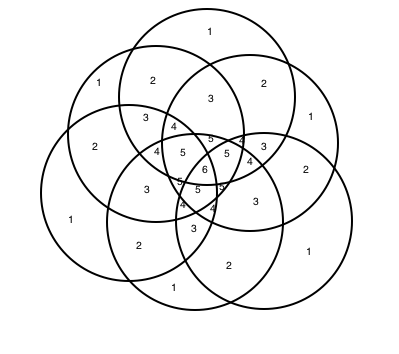
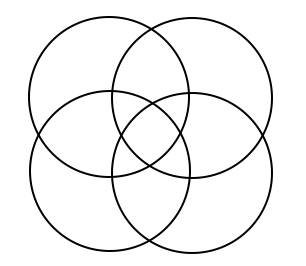
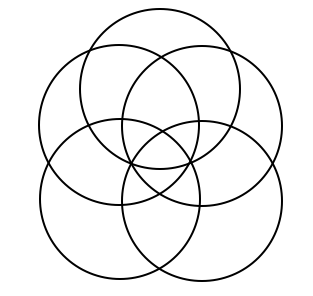
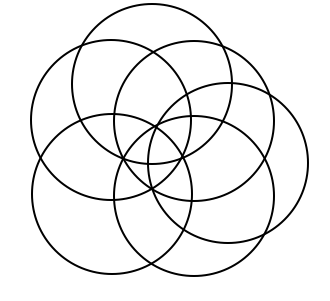
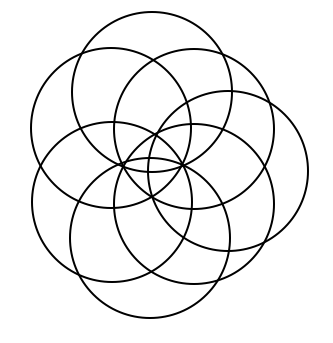
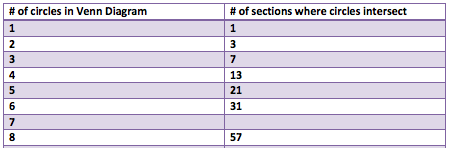
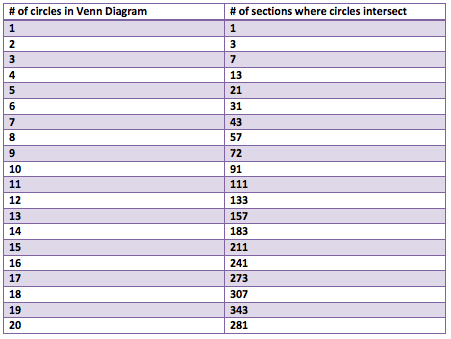
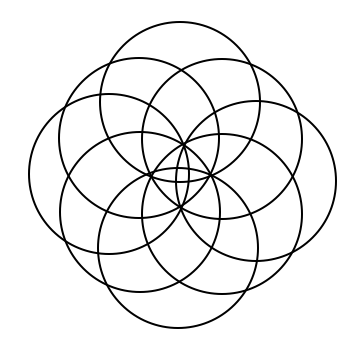
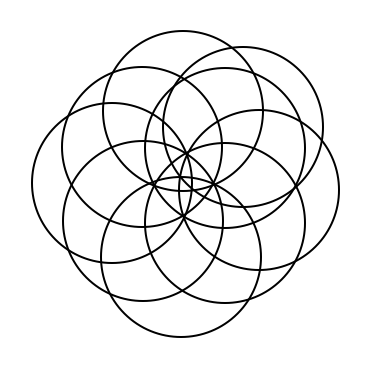
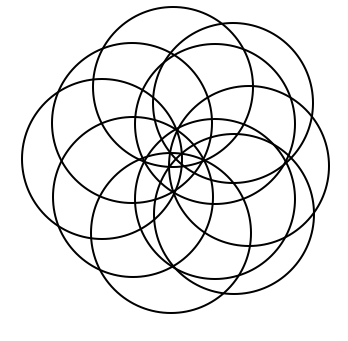
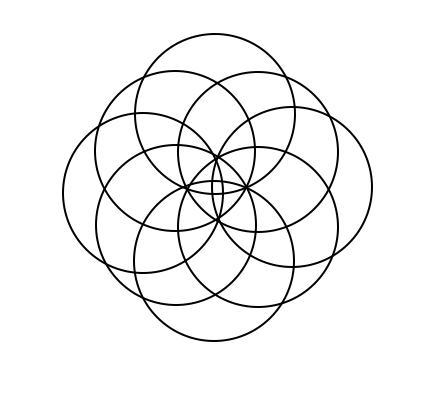
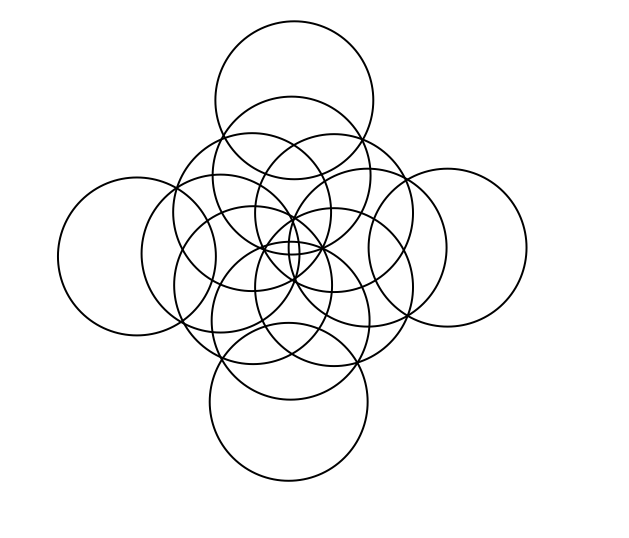
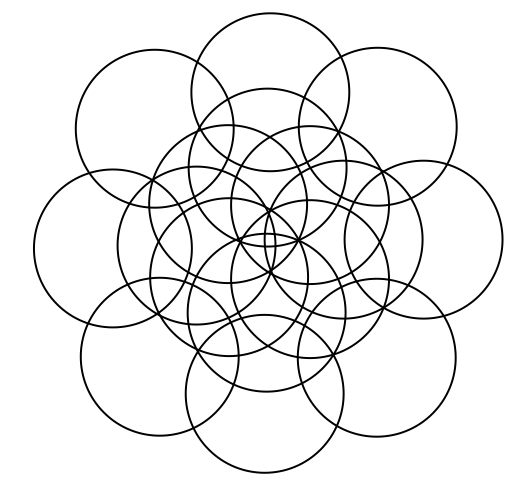
This is a continuation off of something I did for a daily work earlier this past week. For some reason, Venn Diagrams really interest me. It is cool to me how each time you add in a circle, it changes the shape of it entirely. I put together some examples of what a Venn Diagram looks like with 4, 5, 6, and 8 circles. Here's what I came up with. 4 5 6 What I found to be very interesting about this is that working from the outside in, there is a pattern to the number that represents the number of circles that share any given space. For example, on this Venn Diagram for 6 above, there are six spots around the outside that I put a number 1 into. This is because there is only one circle that the space is being owned by. The next level in are the spots being shared by 2 separate circles, the space they intersect. So I put a number 2 in those spots. And so on and so forth throughout the rest of the diagram, I labelled the number of circles that shared the spot. Here you will see a progression of how I created a venn diagram with 8 circles. As you can see, I started with a venn diagram of 4 circles as seen before. I then proceeded to add one circle to each side of the already made venn diagram. I ended up with eight circles total, all converging in the center. Then I started to look at the patterns in the number of sections created each time a circle is added. (As a little bit of a disclaimer, this table only proves to be true when the circles are arranged in a way that correctly follows the pattern, not when circles are randomly added on the sides.) Looking back to the venn diagrams of 4, 5, 6, and the finished product for 8, I counted the number of sections in the diagram. Then I came up with an equation that correlated with the pattern found from the table. So the equation is n(n-1)+1. Using this equation, I was able to fill in the rest of the table. As I was filling in the table, I realized that there was another pattern to what I was doing. I reworked the equation, and found that another equation that works for the same pattern is n^2-(n-1). Tricky stuff! Reflection: I found it interesting that after all of the work I did, I realized another equation that did the exact same job just in a different way. It really was neither shorter or longer, but it provided the same results. Also, I realized about halfway through that the rules I was making and the work I was doing only applied in situations where the circles were placed in a certain way. These rules would not work if the circles are not placed in a way that they are connecting to all of the rest at the center. Over all, this was fun to play around with and figure out. I liked having the chance to realize all of these things, and find this equation, just to satisfy my curiosity instead of doing it because it was a problem on a worksheet that I had to answer.
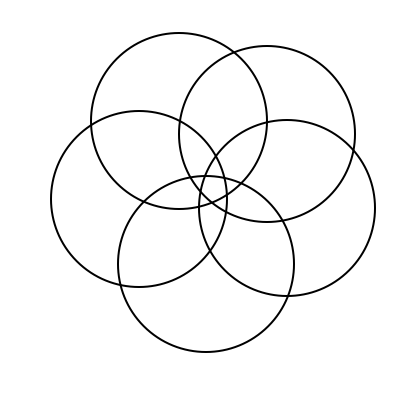
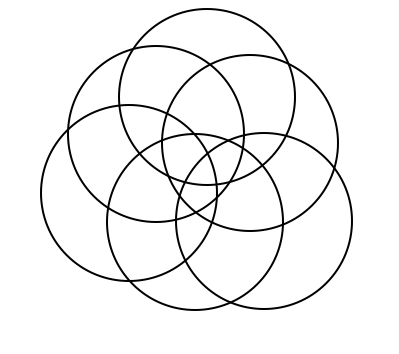
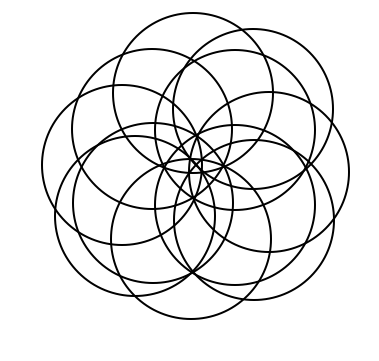
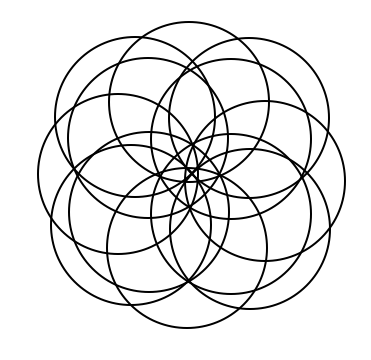
A few more random experimental patterns I made. Note that these do not follow the rule requirements because they do not all touch the center. However, they all do involve the circles being added in a specific pattern. If the fill tool had not been taken out of Skitch, I would have been able to make some cool designs by adding color to these patterns. Gotta hate that Skitch 2.0 update! Also, I wonder what would happen if the circles were different sizes....
|


 RSS Feed